2/17 Ordered circuit board and steppers.
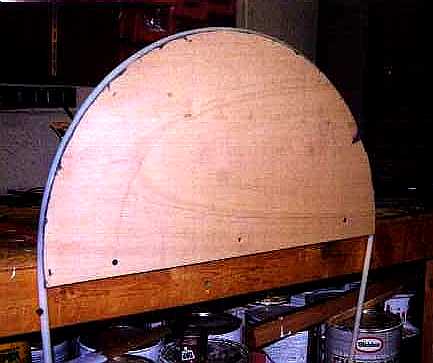
2/27 Cut 26" diameter altitude sector. The sector was first cut out on a table saw. Technique was to drill a hole in the table of the saw 13 inches from the edge of the saw blade. A 1/4" bolt was passed through the plywood and into the table. This acted as a pivot for the ply. The blade was raised 1/4" and the piece of plywood swung around the pivot point. Raise the blade and swing the plywood. This gave a very cleanly cut circle. Only thing to be aware of is the increasing friction as the saw cuts more and more deeply. The 3/4" thickness proved to be about the limit for the small bench mount table saw we used.
Grooving the edge was done by tipping the blade to a 45 degree
angle. A jig was built that held the sector edgewise above the
blade and allowed it to turn. The sector was turned to allow a
1/4" deep cut into the circumference. The sector was turned
side for side and another cut taken. The cuts did not match up
completely and the bit of material left in the center of the groove
was removed with a small chisel.
|
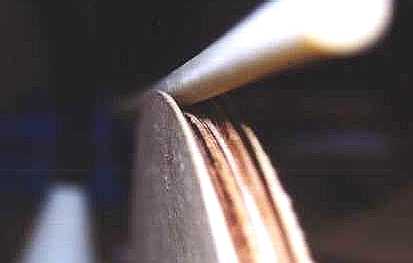
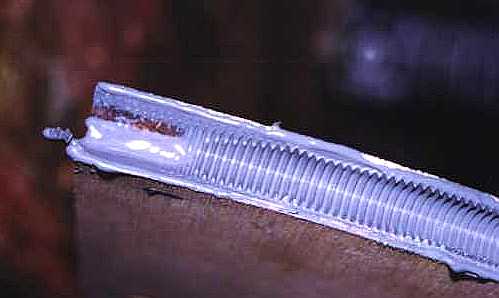
Close up of the sector and groove with threaded rod shown. |
Grooved to depth of approximate 1/4" giving final diameter of geared sector of 25 1/2" or just a bit above 80.1 inches. At 13 threads per inch this should provide a gear of approximately 1041:1 ratio.
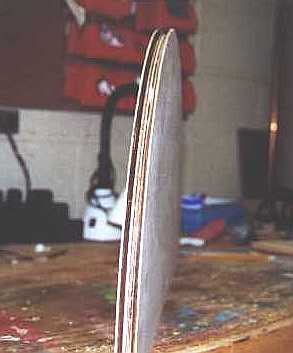
| Sector standing on work bench. |
2/28 to 3/1 Played with both the JB Weld and some QuikSteel epoxy putty. Both give a usable tooth pattern, but it appears the JB Weld molds cleaner teeth. Unlike others, I am having some problems with the JB Weld sticking to the threaded rod. The stuff oozed more than halfway up the rod and held it firmly.
I was only molding short, 2-3 inch sections of gear. When I pulled the nylon rod out of the JB Weld, the bottom came out cleanly, but the JB Weld broke about 1/8th inch into the groove. Will try silicone spray as a release agent. Also need to keep the thickness of the JB Weld down to prevent it climbing too high on the rod.
Have finished my first attempt at molding the altitude gear. It turned out a bit more difficult than I anticipated. Getting an even layer of JB Weld was a pain in the butt. I can see that the depth of the JB Weld (known from now on as plain ol' JB) is not very even. In some places it comes up to the edge of the groove and in others it doesn't. Will just have to wait 24 hours before pulling out the threaded rod and see what it looks like.
3/2 Almost complete success! First of all, the STP Silicone Spray acted as a very good release agent. Almost the entire threaded rod came free with almost no JB Weld sticking to it. Out of a total of approximately 40 inches of sector, no more than 6 inches will need to be recast. There is one void of about 1 inch right at the end of the sector where the rod was apparently not pressed deeply enough into the groove. Also, there are 3 other areas, no more than a couple inches long on each, where the JB Weld was just not thick enough. Teeth were cast in these locations, but I will attempt to remove some of the JB Weld and recast the sector.
3/3 Blech! The repair job did not work at all! I used a chisel in an attempt to remove enough JB to fill in the areas and try remolding. Even though I tried to force the rod down into the existing threads, it never got far enough into the groove to cut new threads in the fresh JB. Next plan will be to pick up a rat tail file and remove ALL the threads. I don't plan on taking the JB down to wood, but just filing until I get a groove back to the point where I can try remolding the entire sector again.
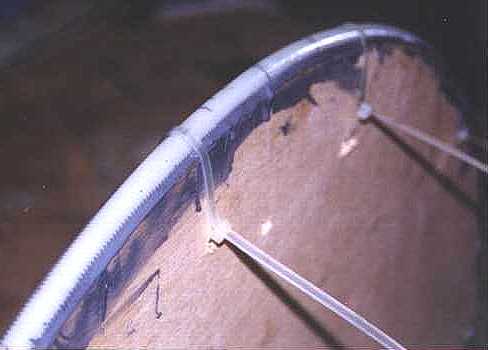
| Close-up showing threads molded in JB Weld. |
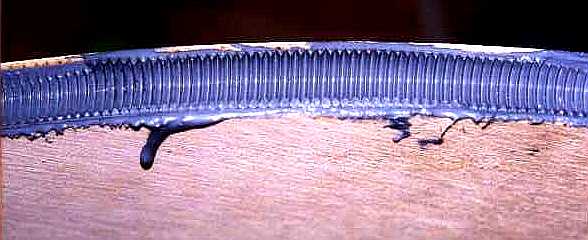
| Another close-up showing the end of the sector where the threaded rod was not pressed into the JB Weld. |
3/5 The JB has been filed down. This time I will try using cable ties through the sector to hold the threaded rod in place. Since the STP Silicone Spray works so well, I won't worry about slopping the JB all over the threaded rod. As you can see from the image above, the threaded rod did not press into the JB at the end of the sector. If you look at the image of the sector, you can see the threaded rod is coming straight down from the groove. For this molding I am pushing the ends of the threaded rod together to force them into the JB. It is also apparent that the JB oozed out of the ends of the sector because you can make out some wood in the above image. It will be necessary to put additional JB at the ends to overcome this flow.
3/6 SUCCESS! Pulled the nylon rod out and the gear looks perfect! There are a couple thin areas which should not cause any problems. I used a small jack plane (5" sole) to shave off the JB that had pushed out on the edge of the groove. That and a bit of sanding and it appears the altitude sector is almost finished. The only remaining steps on the sector will be to cut out some extraneous wood to make the sector a bit lighter and paint the finished product.
 Second molding
attempt using cable ties
Second molding
attempt using cable ties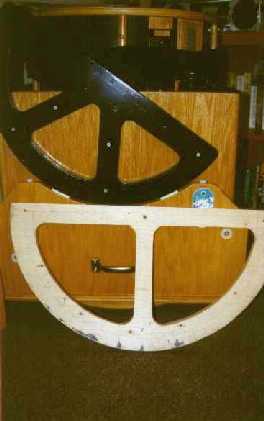 Completed altitude
sector waiting for finishing.
Completed altitude
sector waiting for finishing.